My last blog, Why do glutes shut off?, outlined the three main reasons your butt muscles stop working – pain, position and lack of use. In this blog I am going to provide more information about this powerful muscle group and demonstrate isolating exercises to facilitate their activation. Once you can find and fire these muscles consistently, on their own, you’ll be ready for more complicated exercises – squats, lunges, deadlifts. If, however, you can’t contract these muscles in isolation, you will be forced to compensate. As a result, you will use your muscles improperly when you perform more challenging, multi-joint exercises.
Here’s an explanation. The gluteal complex consists of the gluteus maximus, gluteus medius and gluteus minimus. If you look at the Wikipedia illustration to the left, you’ll see the glute max and med. The large gluteus maximus connects the sacrum–at the base of the spine–to the leg and iliotibial band. In contrast, the gluteus medius sits beneath the glute max and connects the pelvis and thigh bone. The gluteus minimus is the deepest glute muscle, lying under the glute med. Additionally, it connects the pelvis and thigh.
The primary functions of the gluteal complex are hip extension and abduction. In other words, you should extend your hip during the walking cycle every time your leg moves behind you. Hip abduction occurs when you swing your leg to get in or out of the car, for instance. Actually, I often hear how these car movements trigger symptoms for my clients with hip pain. The gluteal complex and individual glute muscles do much, much more than this, but to keep it simple we will focus on these muscle actions.
Before you activate the glutes, you’ll want to stretch your hip flexors. As I described in my previous blog, the hip flexors and gluteal complex work in opposition. If you have tightness in the front of the hip, for example, this can hinder muscle activation in the back of the hip.

Groin Stretch
Start with the groin stretch. First, using a split stance, contract your back quad (front of your leg) so your knee is straight. Now, rotate your hips under like you are tucking your tail down and forward to stretch the front of your hip. Make sure not to hinge at your back and compress your spine. You should not feel discomfort in your lower back. Hold for 1-2 minutes on each side.
In addition to opening up the hip flexors, you may also need to lengthen your quadriceps before doing the bridge exercises. Tight quads will hinder your ability to extend your hip and reach the desired position for the bridge.

Quad Stretch
To start, stand facing a wall or with your hands on a chair. Then, place one foot on a block, back of the couch, bed or other high object. While doing this, keep the quads parallel and stand in vertical alignment with your joints stacked from your supporting foot to your head. There will be a tendency for the stance hip to bump out to the side. Now, contract your glutes to level the pelvis. If you’d like, rotate your pelvis under on the leg that is pulled up behind you to increase the stretch in the front of the thigh. Hold each side for 1-2 minutes.
Although you want to avoid tightening the hamstrings when doing the bridge, many of my clients do so during the learning process. This often leads to aggressive cramps where the client falls over and grasps the back of the leg. If you stretch first, you will avoid this drama.

Counter Stretch
In this stretch, use a counter, a desk, a wall or a picnic table, as shown here. Now, place your hands on the surface, and then align your hips and ankles vertically. Next, tighten your thighs and allow your upper body to drop between your arms while your shoulder blades slide down and together with your head neutral. Hold for 1-3 minutes.
Now that your body is ready, it’s time to get bridging to work on your glutes.

Basic Bridge – Hip Extension
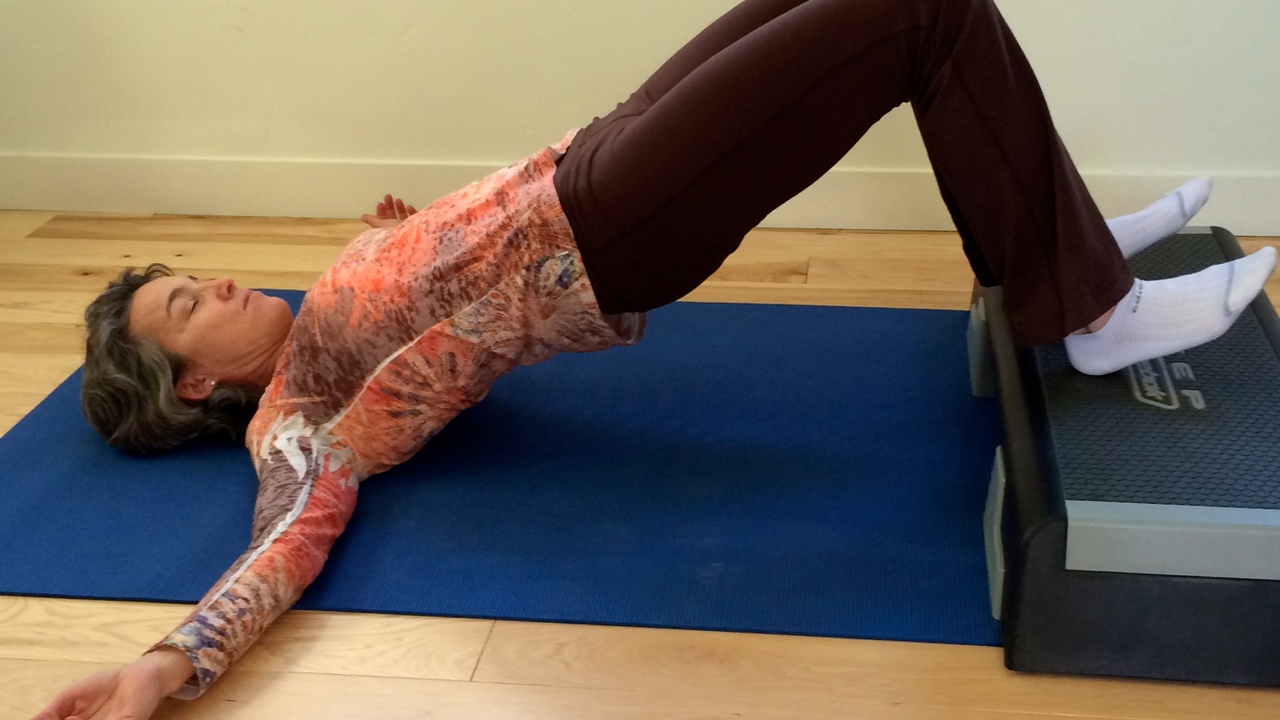
To begin, lie on your back with your feet hip width apart. Next, lift your hips up using your glutes until you have a straight line from your shoulders to knees. Keep your knees hip width apart: there may be a tendency for them to separate beyond your hips. You may want to put a pillow or block between your knees to maintain correct alignment. If you are having difficulty finding your glutes and feel your hamstrings or lower back doing the work, lift your toes and push into your heels. You may also have more success elevating your feet on a low step.

In some cases, the pattern of using hamstrings or the lower back can be so ingrained that another exercise is needed to re-educate the glutes before the bridge exercise will be effective.

All Fours Hip Extension
For this stretch, start on your hands and knees. Now, extend one leg directly behind you until your leg is straight. While doing this, keep your toes on the floor. You should feel your glutes extending the hip. The back stays relaxed and in a neutral position. If you’d like, you can drape your upper body over a chair or ottoman to further release the back and keep it from assisting in the exercise. In order to progress this exercise, add a small lift of the leg after it has been extended.
Combining Hip Extension and Abduction

Bridge Marching
From the bridge position, lift one foot then the other without letting the hips drop or shift side-to-side. In addition to using the glutes for hip extension, this challenges their abduction, side to side stabilizing, function.
One Legged Bridge
As you know, I am a big fan of doing movements independently on the right and left sides to uncover any weaknesses that may have been hidden when doing the exercise bilaterally. In this exercise, start your bridge with one leg raised, then press up.

Bridge with Strap
Here, place a strap just above your knees. Then, pull out on the strap as your lift your hips up. You can also do this on your heels with the toes lifting straight up.
To sum it up . . .
Bridging exercises can be done for a set number of repetitions 10-20 for 1-3 sets or held for extended periods of time 20-60 seconds. I prefer to mix it up. The benefit of the repetitions is training the body over and over to contract and relax the glutes correctly, whereas the advantage of holding the position is enhanced muscle activation. Either way is effective as long as you are consistent. Buns of Steel, here you come!


